Showing posts with label tutorial. Show all posts

Tuesday, December 31, 2013

Tutorial: Replacing Missing Trim/Detail Pieces

This post has no pretty pictures :) just a little practical advice on how to fix a pesky problem.  

I absolutely hate when I go to pick up a piece of fabulous furniture only to find that some of the intricate, or maybe not-so-intricate detailing is missing.  I have to be honest, sometimes I just pretend like it's there and just paint away. :)  Sometimes I just remove the parts that are there.  But, in this case the detailing is something this desk really had going for it and I knew I wanted to paint it to draw attention to it, so I had to fix it instead of sticking my head in the sand. ;)


This is what it looked like. 


This is what it should have looked like. 

And this is how I took care of it!

1.  I found a product called Sculpey.  It's a clay that can be baked in the oven.  This was necessary because I wanted to make a mold and I needed it to be hard.  I found it at Walmart. 


2.  I followed the instructions on the package (which consisted of kneading it a little before using it, lol).  I made it about 1/4" thick and placed it over the trim piece that was whole to make the mold.  I made sure I really pressed it so it would pick up all the little details. 


3.  This is what it looked like when I pulled it away.  I was happy with it so went ahead and baked it in the oven at 275 for 15 minutes and then let it cool. 


4.  When it was cool I used Plastic Wood and pushed it into the mold and smoothed it out with my finger.  I then left it overnight to make sure it was completely dry before I started sanding on it. 
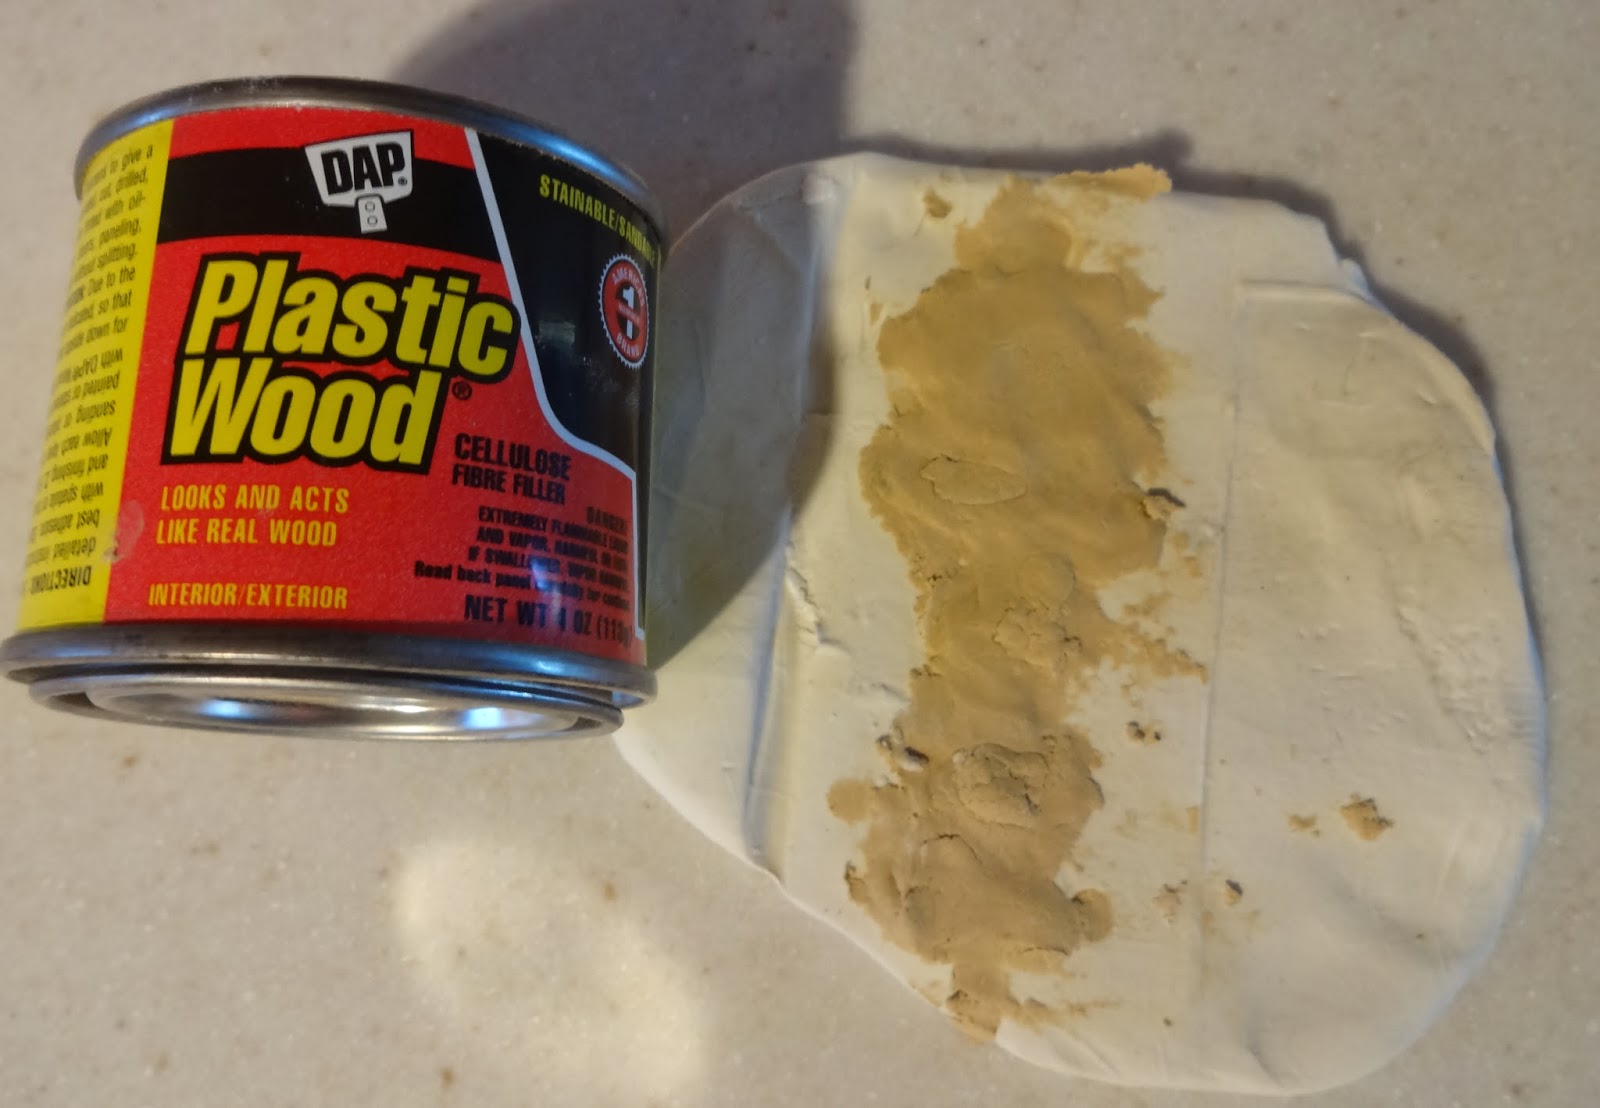


5.  The next day I sanded the back off until it was flush with the mold.  This was the hardest part and took a little bit of elbow grease. :)


6.  I then held the whole mold in my hand and gently bent it backwards until I could see cracks around the edges.  This way I knew the plastic wood was separating from the Sculpey.  I gently broke the mold away making sure to keep my fingers on the thin parts so they didn't break.  This is what I had when I was done.  I then carefully sanded the edges to smooth them out with a piece of 180 grit paper. 


7.  I then cut the pieces off that I needed with a sharp knife and glued them on with Gorilla glue (I wasn't sure wood glue would adhere to the plastic wood).  This would be the kind of glue you have to dampen the surface and it makes bubbles when it's working.  I wasn't sure it was going to work but it held fast!


8.  And, this is what it looks like painted.  Not bad!! 

You can see the whole desk here. 

Hope this helps!! 

Tuesday, May 7, 2013

How to Paint Plastic/Laminate furniture

There is a tab on my blog about how I paint furniture.  I include a few tips on how to paint laminate, but I thought I would share them again. :)

My client brought me this little table and said she had picked it up for 5 bucks! Yep, 5 bucks.  Now, I know we've seen them everywhere (I painted one exactly like it a couple of weeks ago).  This style is usually the same, with laminate tops, pressboard sides, and plastic feet.
Every painter's nightmare, right?


Wrong!  
Pieces like these are just as "paintable" as wood.  You just have to know how! :)


Step 1:  Sand

Always scuff sand really well.  I use a fine 3M sanding pad.  You do NOT want to use a heavier grit to scuff sand on surfaces that are not wood.  It will leave scratches that you won't be able to remove.  The purpose of scuff sanding is to remove any sheen on the finish.  This is especially important for laminate as it is such a smooth surface.  When done sanding make sure to wipe your piece down really well--removing all dust.  This is important, too.  If there is a fine layer of dust on the laminate your primer will not adhere.  Ask me how I know. ;)


Step 2: Prime

I use Rustoleum Painter's Touch in a spray can.  I really do swear by this stuff!  Love how it comes out of the nozzle, how it goes on, how any drips actually run out, and the chalky finish.  It is made to adhere to plastic, metal, and wood.  And, it adheres to laminate!  It comes in black, white, and gray.  Make sure the primer is absolutely dry before painting (no cheating, and be patient).  It actually dries very quickly, so not much patience is required. ;)

If you don't want to spray (or can't) use a good adhesion primer, like this one from Sherwin Williams.


 Step 3:  Paint

After primer you just paint as you normally would.  :)


See, that wasn't scary!  Pretty simple.  It's really not any different than the normal steps you would take, you just have to use the right products.  And, no fudging or your paint will fall off. ;)


Here she is after:


My client picked the color for her daughter and I love it on this piece.  It has a very feminine feel.  I'm a fan of mixing a bright color on a traditional piece.  


 Cute little legs, even if they are fake. ;)


  I love this small pop of green against the bright blue.  


My husband always says all the women call the bright, colored pieces (which he hates) "fun".  Well, I whole heartedly agree that this little night stand is FUN! :)


color = Capri SW

This tutorial and nightstand were featured by 
Thanks Maryann!


Wednesday, November 21, 2012

Rosettes Tutorial

Here's a quick little "how to" on making fabric rosettes.  Again, sorry for the pictures--the lighting in my kitchen is obviously not so great!


First cut a strip of fabric anywhere from 1.25" to 2" wide.  The length depends on how big you want the rosette to be and how tight you roll it.  I used a fat quarter, which is 21" long.  The first rosette I made I  used the entire length and rolled it pretty tight.  It ended up being a little bigger than the size of a quarter.  The next one I used 42" and rolled it a little looser.  It was about the size of the side of my fist (there's a pic at the end of this post to show you the different sizes). 

As you can see, the strip does not have to be straight.  It won't matter because you are rolling it and won't see the edges.  


Next, I folded the strip in half and ironed it.


Then I made a knot at one end of the strip.  It won't matter if you get the knot a little closer or a little farther away from the end.  You can trim it off if it is too long.


Then I pinched the knot between my fingers with the length of the strip on the back side (so I could wrap it towards me and still see what I was doing).  You could do it the opposite way but it makes it harder to see where to put the glue.


Then I twisted the fabric a few times toward my hand and wrapped it around the knot.  I placed a dot of hot glue every quarter turn around the knot.


Keep twisting and turning, placing a glue dot every quarter turn.  You have a little time, while the glue dries, to move it around a little until it looks the way you want it to.  Tuck the last piece underneath and secure with another dot of glue.


This should be what your finished rosette looks like --or something similar.   ;)

Don't forget to pick the little glue strings off! :)  Apparently I didn't do a very good job of that on this one!


I used them for these new lampshades, but you could use them for so many different things!


Hope this gets your creative juices flowing!