Tuesday, December 31, 2013

Tutorial: Replacing Missing Trim/Detail Pieces

This post has no pretty pictures :) just a little practical advice on how to fix a pesky problem.  

I absolutely hate when I go to pick up a piece of fabulous furniture only to find that some of the intricate, or maybe not-so-intricate detailing is missing.  I have to be honest, sometimes I just pretend like it's there and just paint away. :)  Sometimes I just remove the parts that are there.  But, in this case the detailing is something this desk really had going for it and I knew I wanted to paint it to draw attention to it, so I had to fix it instead of sticking my head in the sand. ;)


This is what it looked like. 


This is what it should have looked like. 

And this is how I took care of it!

1.  I found a product called Sculpey.  It's a clay that can be baked in the oven.  This was necessary because I wanted to make a mold and I needed it to be hard.  I found it at Walmart. 


2.  I followed the instructions on the package (which consisted of kneading it a little before using it, lol).  I made it about 1/4" thick and placed it over the trim piece that was whole to make the mold.  I made sure I really pressed it so it would pick up all the little details. 


3.  This is what it looked like when I pulled it away.  I was happy with it so went ahead and baked it in the oven at 275 for 15 minutes and then let it cool. 


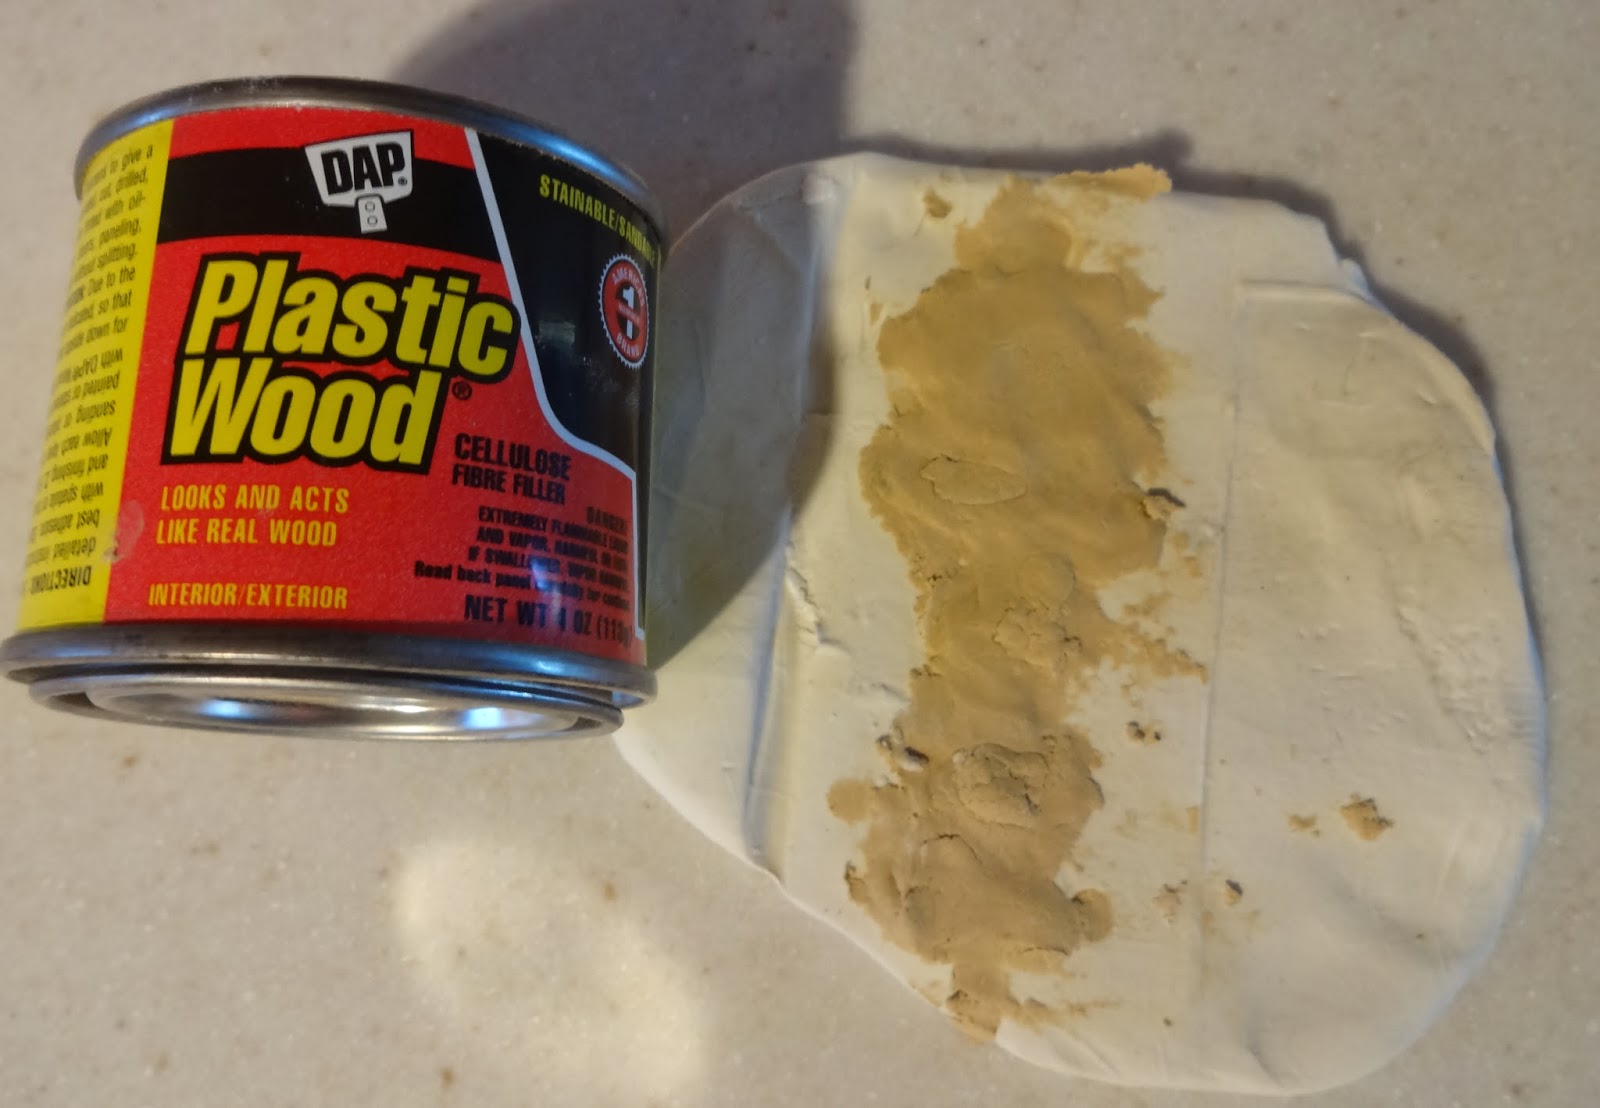
4.  When it was cool I used Plastic Wood and pushed it into the mold and smoothed it out with my finger.  I then left it overnight to make sure it was completely dry before I started sanding on it. 


5.  The next day I sanded the back off until it was flush with the mold.  This was the hardest part and took a little bit of elbow grease. :)


6.  I then held the whole mold in my hand and gently bent it backwards until I could see cracks around the edges.  This way I knew the plastic wood was separating from the Sculpey.  I gently broke the mold away making sure to keep my fingers on the thin parts so they didn't break.  This is what I had when I was done.  I then carefully sanded the edges to smooth them out with a piece of 180 grit paper. 


7.  I then cut the pieces off that I needed with a sharp knife and glued them on with Gorilla glue (I wasn't sure wood glue would adhere to the plastic wood).  This would be the kind of glue you have to dampen the surface and it makes bubbles when it's working.  I wasn't sure it was going to work but it held fast!


8.  And, this is what it looks like painted.  Not bad!! 

You can see the whole desk here. 

Hope this helps!! 

Antique Desk & a Tutorial

I practically drooled over this desk/vanity when I first saw it in person.  Sometimes it's really hard to keep my excitement in check when picking up a piece, but I do my best so I don't freak anyone out or have to pay full price. ;) 

She was a steal and I couldn't wait to get to work! 

The drawers were stuck tight so I actually had my hubby run them through the table saw to shave them down cuz sanding just wasn't going to do it for these puppies.  *I do not recommend running objects, like drawers, through a table saw if you have no experience.  It's dangerous.  Really.  Craig uses the saw all the time and knows what he's doing and it's still scary!


 Before


 After

I chose this soft gray/green because it's casual, neutral, and pairs beautifully with the dark wood top.
*color is Oyster Bay from Sherwin Williams and I did the undercoat in Retreat off the same color chip. It's very subtle under the parts that are distressed a little heavier.


 I picked out the lovely details in a soft white again.  They are still subtle but noticeable. 


 I absolutely love mixing textures, so I wanted something a little more elegant, but still with that antique feel to go with the distressing and the color.  Aren't these knobs fabulous?!  The ones on the desk weren't the originals so I didn't feel too badly about ditching them. ;)


The detail piece running down the side was actually missing parts.  Here's the tutorial on how I fixed it.


 I couldn't get a good pic from the front with the chair, so this is it. :)  I love the soft graphic in this print and lined the drawers with the same fabric. 


 So lovely!!


 The top was in fabulous shape under the old varnish so I sanded it down, gave it two coats of stain, and 3 coats of poly.  It looks blotchy in this pic because of the lighting but it's not. :)


This is my happy place when the degrees are of the negative kind! :)


This vanity was featured by:
Karen @ Redoux
Maryann @ Power of Paint

Thank you! :)

Linked up here:
Saturday:

Sunday: 

Monday:

Tuesday:

Wednesday:

Thursday:

Friday:

Saturday, December 28, 2013

Small Server


Sometimes I like a quick little redo.  I've been "off" for the last week or so while my mom was here (you never get too old to have your mommy around do you?).  I'm so glad she came all the way out here for Christmas (it's a 14 hour drive!) and cherish the time we get to spend together.  She left Friday morning and by 10:00 I was already in my garage. lol   I had this cute little server I picked up a few weeks ago and decided it was time for a New Year makeover.  She needed it!


 Before
She's pretty run of the mill.


 After

I just love how black and new cup pulls can dress up any piece.  


 We all have something that makes us a little different from the next guy. ;)


 This top turned out so nice...feels like glass!


 The drawers on this pieces were pretty dented and dinged, but I left them as is instead of sanding them out.  I love how all those little marks add character.


A little green in my snowy Wisconsin world!


Hope everyone has a happy New Year!