
Before I show this one I just want you to know it's a reproduction, so don't yell at me ;). And, although it is beautiful, and beautifully made, the top was a little rough and it had some pretty big scratches. I actually did a deal in the Toys R Us parking lot for it. ;) This has been my favorite redo so far.

Before
It really was beautiful and I almost decided to strip it and restain it, but I felt like all that gorgeous detail was just lost in the wood.

After

Primed and painted (Snowbound SW) and then glazed with a latex glaze tinted black.
One thing I hate is when someone says, "It's so easy." and then it's not! Glazing isn't rocket science, but you do have to get a feel for the product and the piece of furniture. Here's a few things I've learned:
- Use an oil base glaze over oil paint and a latex glaze over latex/acrylic paint. (Sounds like a no-brainer, but the first time I used glaze I used an oil glaze over latex and although it didn't gum up, it was a little harder to work with.) Tint oil glaze with oil stain/paint and latex glaze with water-based products. Latex glaze dries faster, but it's easier to work with and the clean-up is easy.
- I use an old paint brush to apply the glaze because it gets in all the little nooks and crannies (which is where you want the glaze to be!). You could use a sponge brush, too, but I always have an old paint brush handy. Brush it on and work small areas at a time or the glaze will dry and become more difficult to wipe off.
- You can use a dry cloth or a damp cloth to wipe off the glaze (I normally wipe it off within a minute of applying it). A dry cloth will leave more product on the piece--if that's the look you want, go for it! A damp cloth takes off more product and I like this a little better. The wetter the cloth the more product will come off. If the cloth is too damp and you wipe too many times in the same spot you can lift the paint.
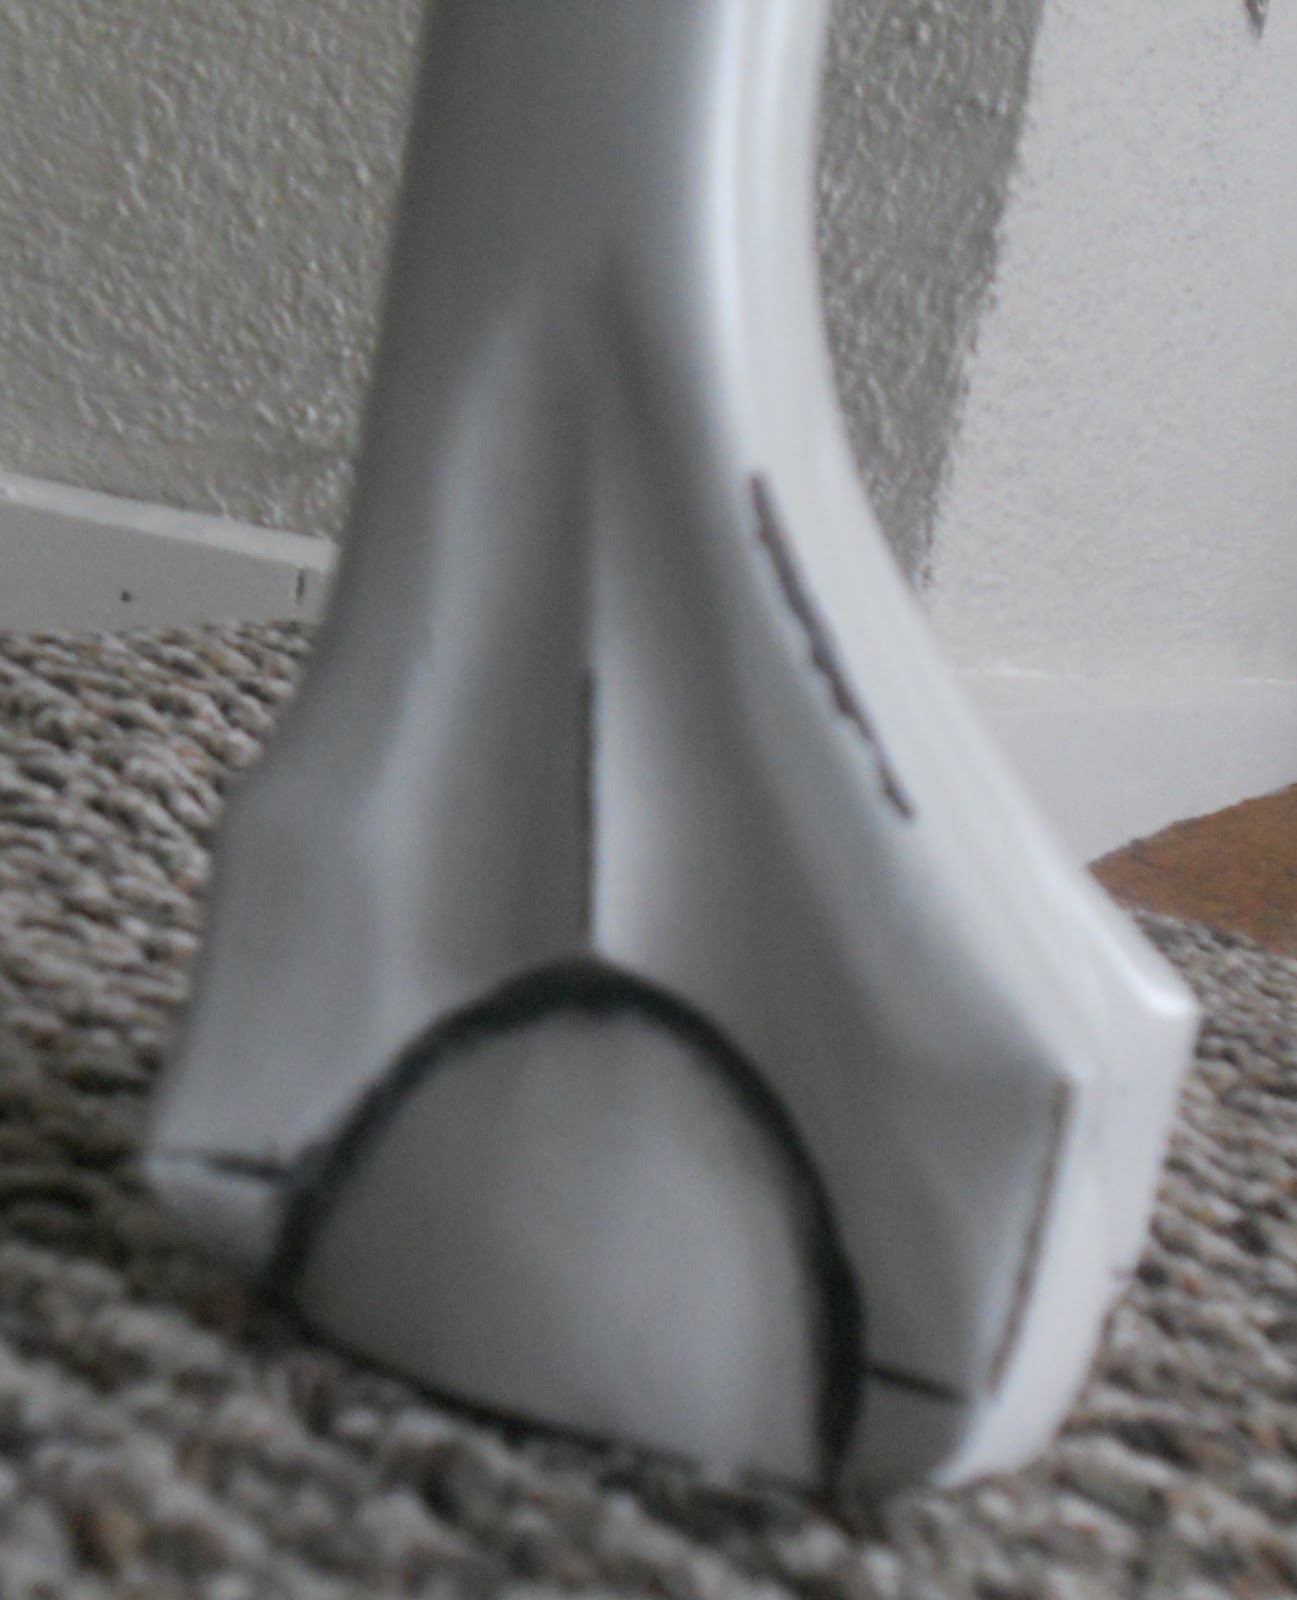
- Wipe the opposite direction of the detail. *the fan on the bottom edge of the buffet was vertical detail, so I wiped horizontally and then used the edge of the cloth to lightly run down the middle of the fan to remove the excess glaze
- Don't be afraid to play with it! If you take off too much you can always apply more, if you take off too little you can always sand (wet sanding with a superfine sanding pad will take off a little product and wet sanding with a fine sanding pad will take off most "oops" or left over glaze that dried where you didn't want it to). *wet sanding=dampening a sanding pad


Glazing this piece brought out details I didn't even see when it was just the wood. I love the detail on the corners!
My favorite part about this are the feet! You don't see ball and claw feet very much anymore and these are just awesome! I think I might have a foot fetish now. ;)


I LOVE them and the finish feels like silk!

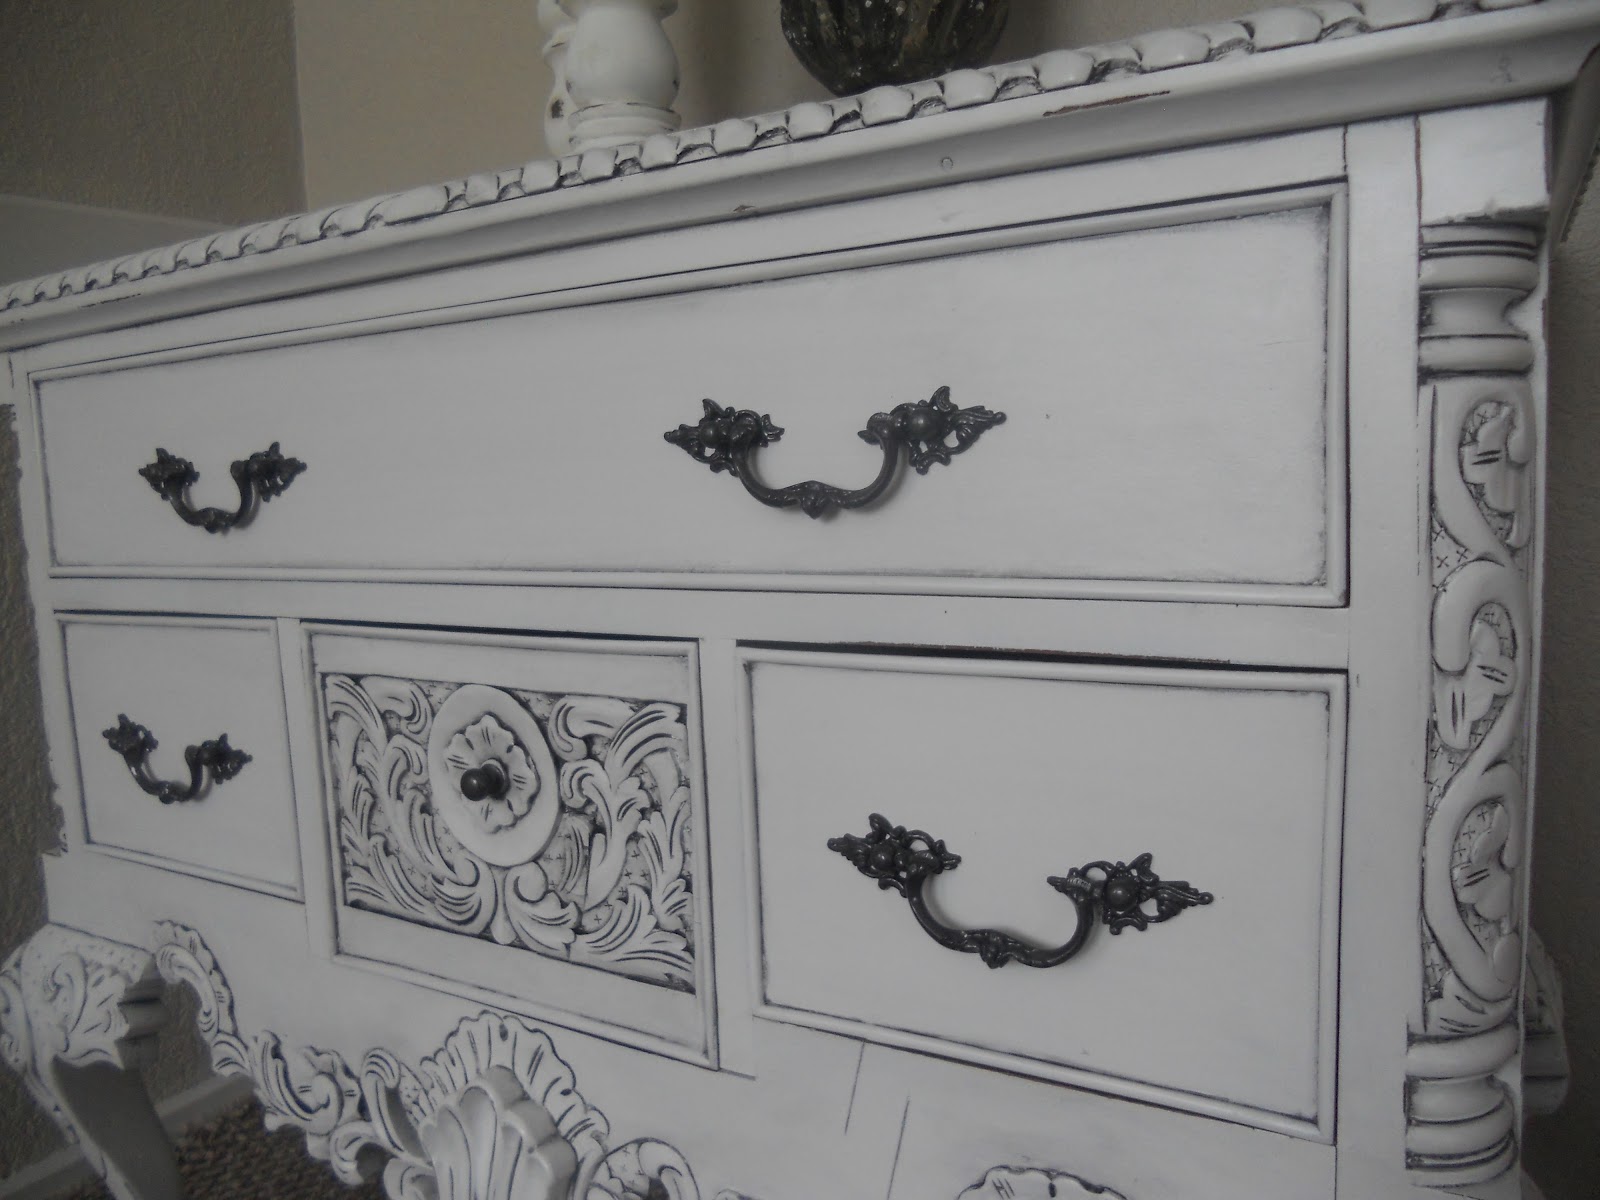
This is the original hardware spray painted with a soft metallic.
SOLD
36" W x 18" D x 32" H


