Showing posts with label red. Show all posts

Thursday, July 2, 2015

Bassett Side Table in Tuscan Red

I was curious to know what I was working on at this time last year, so I went back on my blog and it's funny because I was working on a dresser for the same fabulous lady that this side table belongs to! 

I still love working with Roxanne from The Rustic Shed.  She is such a sweet soul and she has great taste and a lovely store to prove it!

She brought me a few end tables to work on and said she wanted something bold for this one.  I said, "Like red?"  She said, "Oh, we're on the same page!"  It's a such a great color for this beautiful FP Bassett piece.  She's looking feisty for the 4th of July!


BEFORE


 AFTER

The color is Tuscan Red from General Finishes (one of my favorite paints to work with!).  I love how the subtle distressing just highlights the great lines of this piece. 


 The top refinished beautifully with one coat of Java Gel and 4 coats of High Performance Top Coat from General Finishes.  It literally took me hours to sand the edge by hand.  I finally resorted to using a razor blade to scrape out the inside edge. I'll be happy not to do that again for a while. ;)


This is what I love about General Finishes,  It levels out so beautifully!  And, I love the soft sheen it has when it's dry. 


I love a French Provincial pull and these had the best patina, so I just left them as is. 


Tuesday, March 24, 2015

Oak Tables in Tuscan Red

These oak tables are a custom order from a good friend of mine.  She said they were old and outdated and needed some help!  We all have a piece of outdated oak in our home somewhere.  I can't tell you how many people I talk to that say they were just going to throw them away.  

STOP
 right there if you are one of them.  I promise you can "fix" them with a little paint and stain and they will be magazine worthy again! psst...at only a fraction of the cost of buying new! 


 BEFORE
This is one of four.  You can see the other three lurking in the top left corner. ;)


She wasn't exactly sure what she wanted so we talked about the colors in her home, I gave her a few options (with the one I hoped she'd pick, lol), and she decided on Tuscan Red (the one I hoped she'd pick, yea!).  


 AFTER

I've played with reds a lot over the last 3 years and just have never found one I was completely in love with until I met Tuscan Red from General Finishes.  It's not too orange, it's not too blue, and it has great depth.  It's very versatile and looks amazing with a wide variety of other colors. 

I have to give a shout out to General Finishes here, too, because their products are simply amazing.  I've used a LOT of paint over the past few years, and, honestly, GF is my favorite.  The coverage is incredible, the colors are yummy, and the finish is silky smooth.  I promise you won't be disappointed if you give them a try.  


 I updated the hardware with these simple antique silver pulls instead of using the big wooden knobs that were original to the piece. They make a huge difference (just changing out the hardware on a piece of furniture and can totally change the look and feel of it).


 Oak is kind of a bugger to stain dark, but this is another reason I love GF Java Gel.  Two coats and she's a beauty again (bye bye 80's). 


Moral of the story?  Don't give up on those 80's oak pieces just yet!  A few hours and a few products and you can have yourself a brand new piece of furniture! 


Saturday, October 11, 2014

Vintage Lowboy in Tuscan Red

 
 Pure luck is what brought this vintage lowboy and I together.  My hubby asked if I wanted it and I said (with an extremely confused look on my face because I can't believe after all this time he would even think he needed to ask), "Uh, yeah!"  (Duh, honey.)
 
He said it was ugly and I almost kicked him out of my garage.  Ugly?  Pphttt!
 
I have a super soft spot for lowboys. It's bad.  It doesn't really  matter what they look like, I love em.  This one was an empire AND curvy!!  The lowboy of my dreams!  I drooled all over it and then made myself finish up my custom work before I got my little hands on it.
 
And, I had another fabulous piece of luck.  I love General Finishes products, but I can only get the Gel Stain close to me.  And, if you haven't figured it out by now I'm kind of a cheapskate, so I shy away from ordering paint products online unless I just absolutely can't live without it. 
 
I was in contact with Tara from GF about the recent dresser I refinished with the wood drawer fronts.  She asked if I had ever used their milk paint(which is not a true milk paint, but an acrylic) line and I hung my head in shame as I told her, no, I hadn't.  Well, guess what showed up in the mail a week later?!  You guessed it!  A box full of goodies.  I was so thrilled and ripped that sucker gently opened the box to see what was inside.  There were three cans of paint and a topcoat.  Oh boy!  One of the colors was Tuscan Red and I knew immediately that fate had intervened for my little lowboy.  A perfect combination!
 
I know, I know.  You want to see the pics.  Just hold your horses cuz I have to tell you about this paint.  The consistency is perfect.  Now, I've heard amazing things about GF paint, but I wanted to test it myself so I whipped out my brush and brushed the drawers of this lowboy.  I still sanded between coats, but I'm not sure I even needed to.  It levels beautifully and covers like a dream.  If you have been on my FB page I posted a pic of the drawer fronts and ppl were asking me if I sprayed them.  It's that good!   I'm dead serious when I tell you I only did 2 coats on most of the dresser.  Two coats!  For red!!  If you've ever painted with red you know two coats is unheard of. 
 
Bottom line.  I love LOVE it!  Big, huge, ginormous shout out to General Finishes and you can find them on FB  here.  If you haven't tried their products you are definitely missing out!!


Before


After


That is one sexy piece of furniture I tell ya!  (sorry mom)


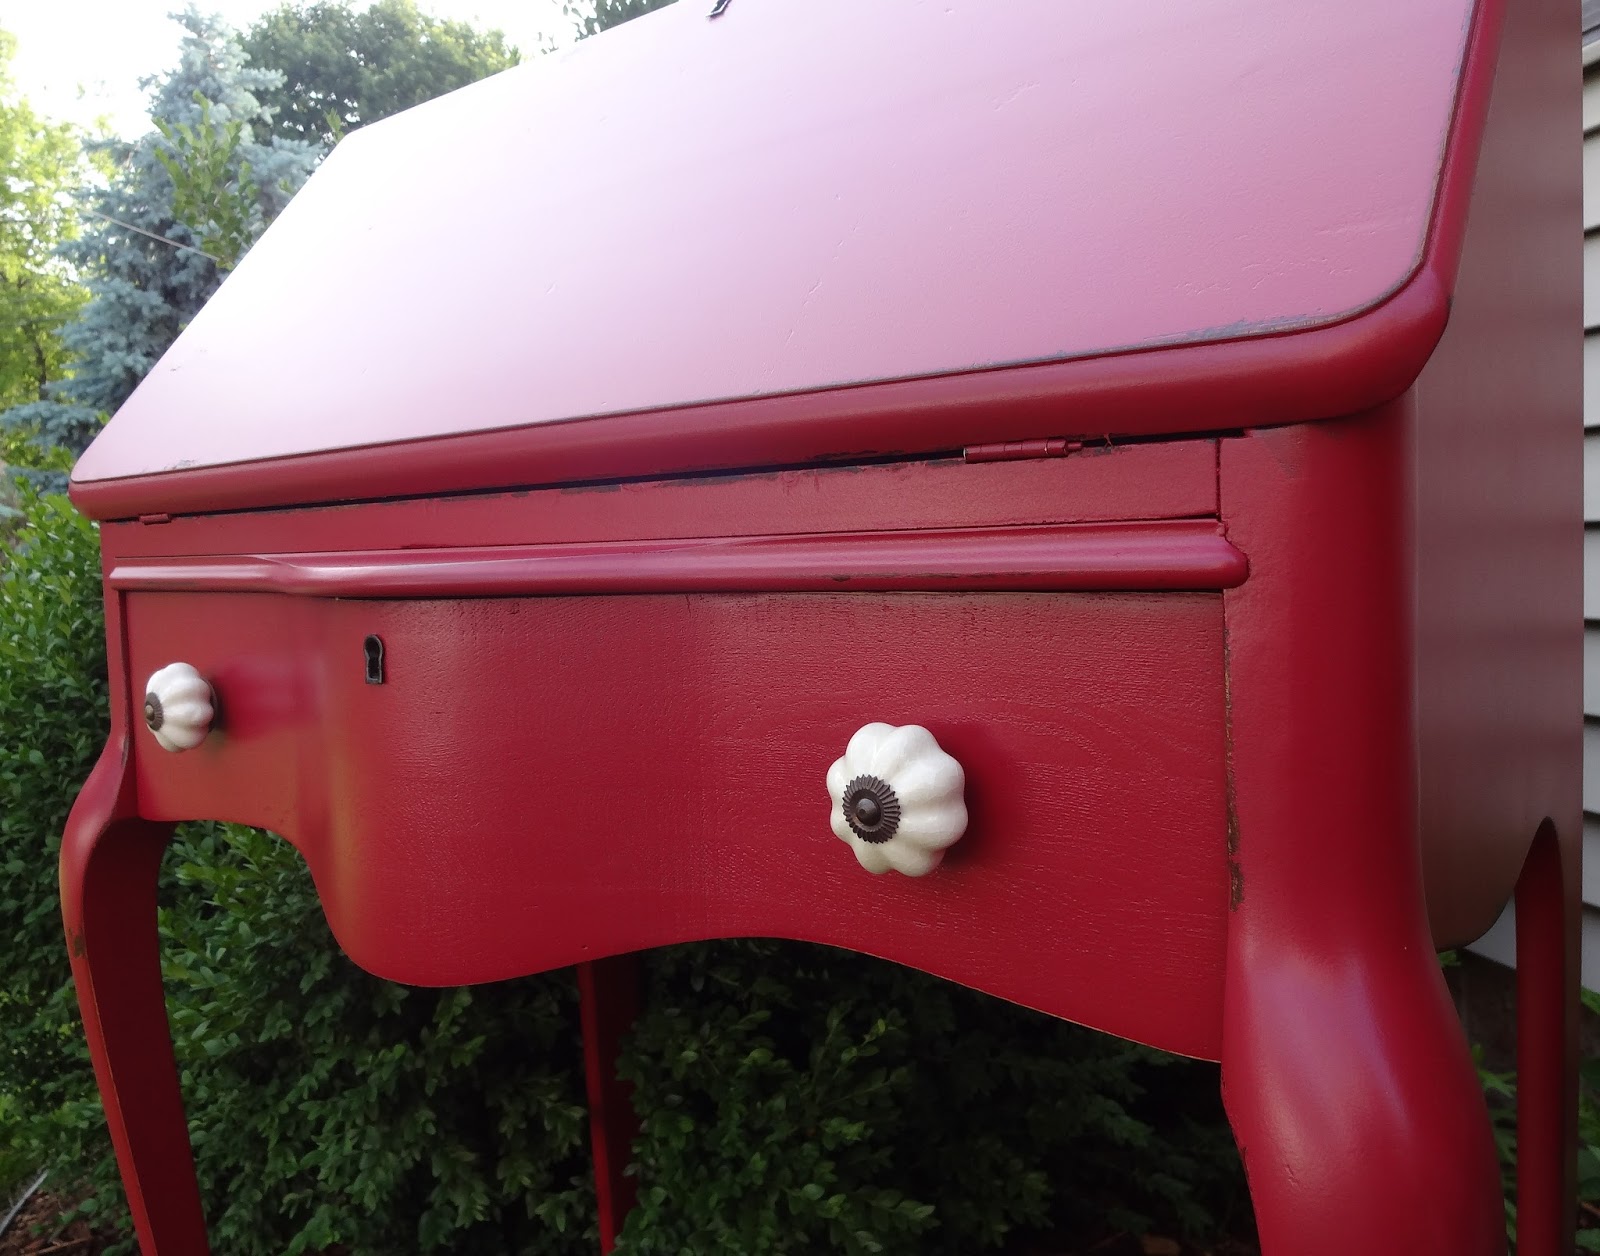
 I bought these knobs as a "just in case" for the white vanity I recently finished and was so glad I decided not to use them because they are so perfect against this deep red. 


This is the finish I was talking about.  AmAzInG, right?!!  Like silk. They recommend to sand with 220 between coats, which is what I always do anyway.  I promise you, you WILL notice a difference in your finish if you sand, sand, sand!!  It's a dirty job but your furniture will thank you for it.


 So many times I get pieces where the keyholes are there but the covers are missing.  I was so happy to see they were all there! I simply popped them off (be careful doing this), painted, and then put them back on.  I also loved these simple, flat black knobs for the smaller drawers.


 The grain in this top is amazing and I definitely did not want to paint it.  It's a hardwood so didn't take stain as well as a softer wood would, but Java Gel from General Finishes didn't let me down.  It's a beautiful piece of wood.


This piece is
SOLD!!

Wednesday, October 8, 2014

Ode to Fall: Dresser in Tricycle

I'm not much of a seasonal decorator.  In fact, if it weren't for the cute pouty face of my almost 10 year old daughter I probably would do no seasonal decorating.  I know.  I'm a stooge.  The thought of getting it all out and then having to put it all away gives me anxiety.  I am no different when it comes to painting really.  I paint whatever color whenever I want to. 
 
That being said, my client wanted this dresser red and it's perfect timing for fall.  So, consider this my Ode To Fall!! :)
 
The dresser was in good shape so it didn't need a lot of prep work.  She wanted me to use MMS milk paint in Tricycle.  I don't work with milk paint a lot, but I know it kind of has a mind of its own.  Not a good thing for a perfectionist with a touch of OCD such as myself.  She wanted it chippy and I was actually afraid it wasn't going to be chippy enough.  The finish was very flaky so I ended up sanding the whole thing down with 150 grit.  That sounds like a lot of work, but it really wasn't.  The finish was so old it came right off.  I know milk paint bonds really well to bare wood so I ended up staining the drawer fronts dark and then giving them two coats of poly so the paint wouldn't bond as well.  It actually worked really well and I love the texture of the paint. 
 
We need to talk about that.  Like I said, I'm a perfectionist and I've prided myself on my finish.  I like it smooooth and even.  Well, that is not the nature of milk paint so I had to put all of that aside and just go with it.  The finish is still smooth, but milk paint flakes and chips and there's a lot of depth to the paint (meaning there's a lot of variation in the color).  I took a few close ups so you could see what I mean if you aren't familiar with milk paint. 
 
I also chose to use hemp oil instead of poly (sorry ladies, you may stone me, but wax is just too much work for this gal) to really deepen the color of the paint.  It really makes the color come alive.  Love that!
 
 
 Before
I've shown you my ugly garage so many times it doesn't even bother me anymore! :)


 After

I'm loving it!


 This is the top before.  Yikes, right?!!
 
I sanded it down with 150, making sure to remove any small scratches that the sandpaper may have left behind.  Gave it a coat of Java Gel and 3 coats of Minwax Polycrylic.
 
 This is the top after (ignore the dust specks, we were having 70mph winds when I took these pics!).  Can you believe it's the same top?  I love restoring a nice piece of wood!


 I really do like the texture of this!  I love milk paint for the authenticity it brings to a piece.  Sometimes distressing can look contrived, but milk paint never does.  It looks like what would naturally happen over time.


 It's a contradiction of smooth and flaky. ;)


color = Tricycle MMS
top coat = hemp oil

Friday, June 21, 2013

Red Red Wine {secretary redo}

This is one of the pieces I picked up during my daughter's softball tournament.  Truth be told, I still get excited when I find a cute little antique and tend to overlook a lot of crap "blemishes".  I loved the curvy drawer and the queen anne legs so I dismissed the cracked/peeling veneer and the inside (which literally had goo in it).  

It was a lot more work than I had anticipated.  I had such a hard time deciding what to do with this one, but I love how it turned out!


Before: this is after I had peeled the damaged veneer


 After

I had this color tucked away in my "idea book".  It's Red Red Wine by Behr.  I absolutely love it!  It's deep-not too bright, but not muddy at all.  I actually decided on it because when I started scuff sanding for prep the stain was a very deep red and I knew it would be a nightmare for bleed through if I didn't sand it all the way to the bare wood (which I was NOT willing to do!).  Painting it red alleviated that problem! :)


 Gotta love those long legs!


I had these knobs in my stash (which is growing!) and I love how they add a little feminine touch.


Long legs AND curves...lucky girl!!  I had to do 4 coats which makes distressing with a sanding block a little painful so I used my paint scraper instead.  I actually prefer the "chippy" look anyway. :)


The inside was a disaster, so I took the whole thing apart, painted all the pieces separately, and then reassembled it.  


Another one I want to keep....  lol

Featured by:
Christine @ The DIY Dreamer
&
Karen @ Redoux

Thanks ladies!

Linked up here:

Saturday:

Sunday: 

Monday:

Tuesday:

Wednesday:

Thursday:

Friday: