Showing posts with label vanity. Show all posts

Monday, September 28, 2015

Antique Vanity

I almost don't want to say anything about this vanity.  It really is one of those pieces that you only get your hands on once in a lifetime (although I pray that's not the case!).  It's a beautiful piece and it was in very good condition (just some minor veneer issues on the inside panel). 

I was so excited to get to work on it that I forgot to take a before!  I can't believe I did that! 

The wood was beautiful.  It's made of mahogany, walnut, and maple.  I wanted to keep as much of it as possible, but still help all that detail stand out. 

I had a very hard time deciding what to do with it, so chose to keep it neutral.


 AFTER


The top was in such beautiful condition that I chose not to refinish it.  I used Minwax Antique Oil to revive and protect it. 


Same with these burled maple drawer fronts.  Just a little bit of oil and they looked amazing. I also chose to keep the original hardware.  I couldn't picture anything that would look more appropriate. 


 I also chose to keep the mirror frame natural and to contrast it by painting the spindles. 


 I painted the drawer fronts Hardware from Sherwin Williams and then painted the body and all the detail in my custom off white. 


 The feet are incredible and I glazed them to help the details pop. 


She is so beautiful.  Nuff said. 

Friday, August 14, 2015

Antique Vanity in my white


This piece was another mercy buy.  I picked it up from an elderly lady who said she'd had it for 40 years.  It was left in her home when she bought it, so it didn't have sentimental value to her, but she liked the piece and wanted to do something with it one day.  Well, that day never came.  When I went to pick it up it was in very rough shape.  So much so that I wanted to leave it there.  BUT, I had driven an hour and she looked so hopeful that I just couldn't say no! Yes, big big big problem of mine!

Last week a man asked me how I could charge $250 for a dresser.  Well, I knew he didn't know furniture, but I also couldn't let the opportunity to rid the world of one more ignorant person pass, so I simply told him exactly what cost went into a restoring a piece of furniture.  What I did not tell him was the WORK that goes into restoring a piece of furniture!

I also gave him a little cost comparison between refinished antique furniture and Pottery Barn.  We all know most furniture (yes, even the "nice" stuff) is MDF compared to all wood furniture from the past.  But, I would sound like a broken record if I went into all that again.  Suffice it to say, he did not have anything to say when I was done. ;)  (What?  I was nice!)


This pic is an in-progress pic of the veneer coming off the top.  It was lifted (the sub layer, too, which had to come off as well) and cracked all over (no way to fix it).  I was sad to have to remove all that mahogany veneer but it had been sitting in a damp garage and there was no salvaging it.  I was lucky there was some good wood underneath all of it. 

I used an iron and a damp rag to loosen the glue and a chisel to remove it. 


Same process for the drawers.  Yep, it's a mess and it sucks!  The drawers were worse than the top.  Most of it was barely hanging on. 


 I glued the sublayer back on and clamped it.  And, the beading came off when I was peeling the veneer.  I loved it so much I couldn't see it go in the trash, so I painstakingly glued it back on. Yep, it sucked, too, but it was worth it. 


 The top part of the mirror was completely missing so I had hubby  make me a new piece.  It wasn't curvy like the old piece but it's a lot sturdier and got the job done! :)


The drawers were ink-stained and nasty, too.  I gave them 2 coats of shellac and then painted the.


 Here it is after I peeled all the veneer, patched the dings, and sanded it all down. 


AFTER

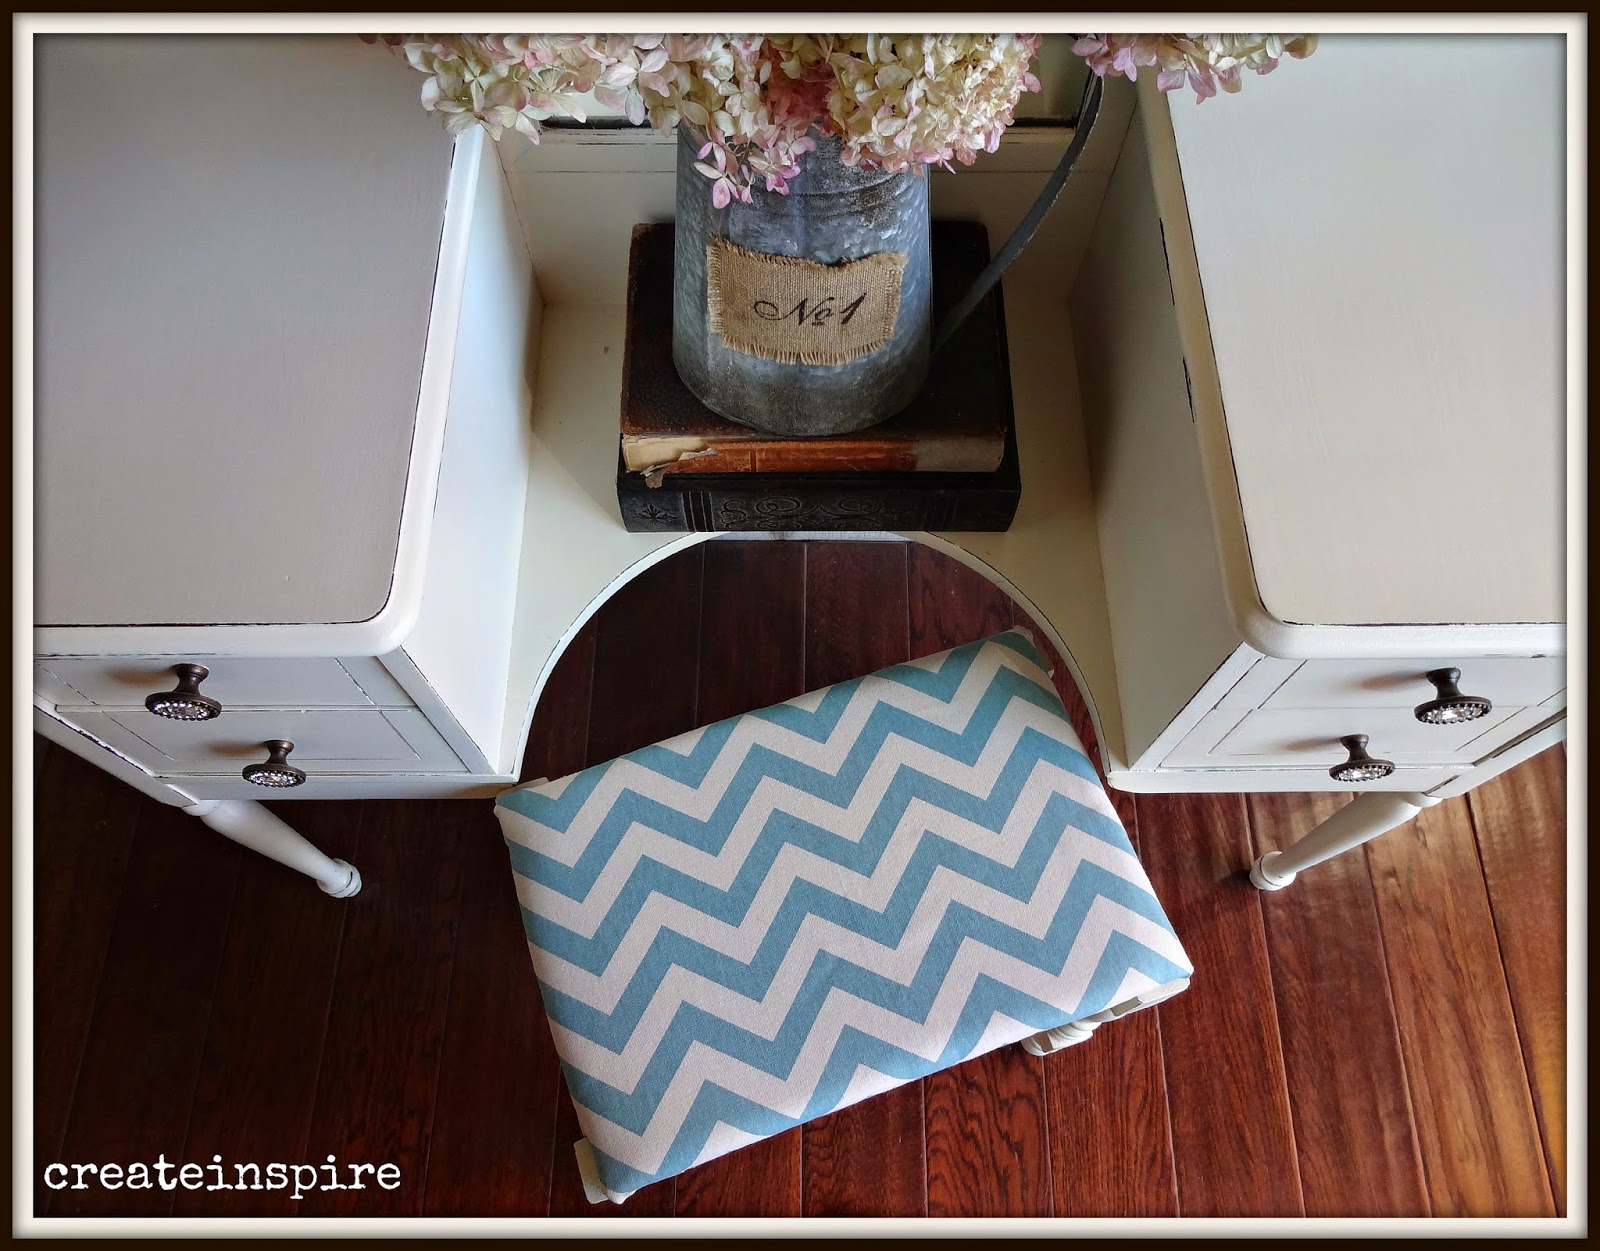
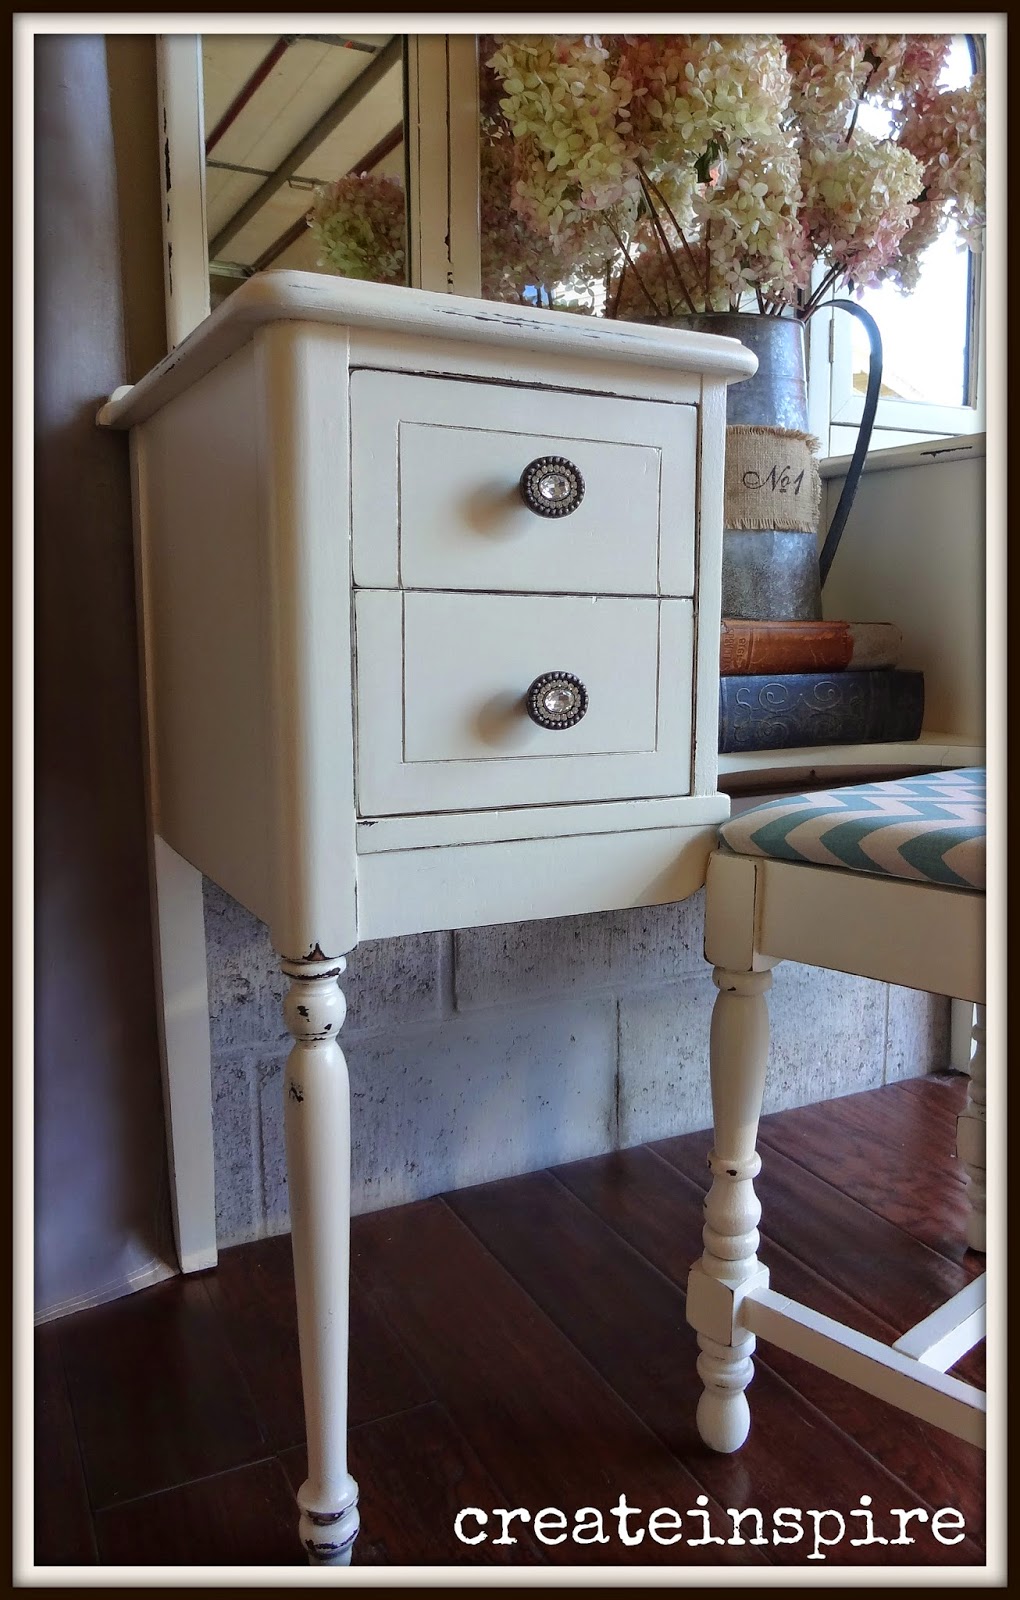
I loved how rustic this vanity looked and I wanted the final look to be in keeping with it's age and condition.  It is a beautifully solid piece (thank you  master craftsmen), but she's got history!  I used a custom white and a custom turquoise to keep it soft and then heavily distressed her. 


I found these knobs on Antique Farmhouse and just had to have them.  Then when I saw this vanity I knew they just belonged together.  So beautiful.  And, look at all that texture from the old medium that was on the details. Makes my heart go pitter patter!! :)


Ok, I seriously just want to touch it right now.  I'll be right back....


Yep, love it. 


This is my favorite part.  I was sad all the veneer had to come off the top, but was happy to see there was solid wood underneath.  Now, it wasn't perfect, but neither is the rest of the vanity.  I love a dark top, especially with white, but I just felt like it would be too formal for this piece.  I opted to sand the existing wood down and stain it gray.  Yep, it was a first for me.   Minwax has a new color and this was the perfect piece and the perfect wood for it.  I don't think it would do anything to a dark piece like mahogany or cherry, but think it looks great on lighter woods like oak and maple.  Now there were gouges in this wood (after all it was just the sub layer) and the gray stain settled nicely into them and just darkened the rest of the wood a little.  A perfect weathered look! I sealed with 3 coats of poly. 


My hubby said, "What about the cracks?"  I said, "What about them?"  He said, "Don't you want me to fix them?"  I said, "Nope, I love them just the way they are.  They're perfect."  I then got "the look".  Oh, you know the one I'm talking about! 


Cute little legs. 


Drawers are so much nicer when they're clean. ;)  I promise your buyer will thank you for it.  I wax the outside and top edges, as well, so they slide easier. Works like a charm.


I adore everything about it! 


Thursday, February 5, 2015

Vintage French Provincial Vanity

I see a lot of French Provincial furniture that looks like this, but I don't think I've ever seen a little vanity before.  My client said it belonged to her husband's grandmother, so it's another piece that gets to stay in the family.  You know I love that. 

It was very outdated but an upgrade with black paint, new hardware, and these awesome vintage looking maps fixed that. :)


 Before


 After

Before it was a little blah (no offense) but now it has presence!  


 I still get a lot of questions about my finish.  I promise you it doesn't matter if you brush, spray, or roll a good finish comes from sanding!  It's more work, but the results are so worth it!  220 between coats, every coat. 


I like to use script on drawer fronts, but these maps were just something a little different.  I adhered them, sealed them, and then stained over them to darken them up a bit.  I finished with a coat of poly. If you use stain you need to top coat it with something as it can remain tacky if you don't. 


Thursday, October 9, 2014

Vintage Vanity in French Vanilla

I have a soft heart.  I can't help it.  I feel sorry for lost kitties, sad babies, heartbroken teenagers, bugs on their backs, and ugly furniture!
 
So, when my client brought me this little vanity and said, "I'm not sure you can do anything with it."  I took it as a personal challenge because, let's face it, it definitely fit in the ugly furniture category!
 
Someone, bless their heart cuz I am not here to judge, tried to "revive" it by giving it some sort of hideous, drippy, stain wash.  I'm not sure how old or experienced they were or what their intention was, but it was definitely a project gone wrong.  I know you can't tell from the picture, but you will just have to trust me when I tell you it was bad!
 
It's actually a very pretty little vanity with great bones and she chose a very neutral color which I think compliments it beautifully.  Sometimes simple is best (and always versatile and classic!).
 
 
 Before
Poor, poor baby!


 After
 
Much better!  Like a breath of fresh air!


 She's not sure she wants to reuse this stool, so I covered it in a piece of left over fabric for the mean time. It looks very "springy", but just imagine it with an orange pumpkin on it and we're all good. 
*pssst, I actually love turquoise and orange together!


 When I was done she whispered "thank you" to me.  The vanity, not my client, silly!  I didn't let my client see it yet.  I'm kind of a witch that way. ;)


 Every girl needs some bling and I think the gal this is going to will appreciate a diamond (yes, they're fake, but don't burst my bubble please!) encrusted knob, or 4!


 After the chippy red dresser I sadly admit I reverted to my old ways and put the polish
 on that finish. ;)


color = French Vanilla from SW


Wednesday, September 10, 2014

Antique Vanity and Sunflowers

I've had an awesome lowboy sitting in my garage for a couple of months now and I've been deciding on what to do with it.  I finally decided, but time has gotten away from me and I haven't gotten around to doing it yet. I wanted to do it the first week school started, which was the first week of September and I knew I wanted to stage it with sunflowers when I was done.  My neighbor across the street had a beautiful patch of sunflowers and I asked her if she minded if I cut a few.  She said I could help myself (so sweet!), but I didn't want to cut them too early and have them wilt before I could use them.  I was almost as excited about the sunflowers as I was about the piece. haha  

Well, I still haven't gotten around to doing the piece and the sunflowers are quickly fading now! We've had a lot of rain and it's been windy and I was worried I would  miss out.  I went over yesterday and her hubby let me pick the two they had left.  They were beautiful but I needed more.  So, I drove around town until I saw another patch in someone's yard and went right up and asked her if I could cut her sunflowers.  I never do stuff like that, but I was desperate! :)  She said I could!  So, here's a shout out to all you lovely people in my community who were willing to help a gal stage her furniture for her blog! 

Like I said, I haven't completed the lowboy yet, but a client brought me this antique vanity, so I used the sunflowers on it. ;)
\


 Before
Not only do you get to see the before you get to see all the junk in my garage!  Well, that's life folks. :)
This piece had burled maple veneers over mahogany! Can you believe that?  The veneer wasn't in great shape anymore, it's a little warped, and someone had already stripped white paint off of it.  It had also been sitting in a basement for years and the wood was discolored. It's a solid piece though and I love the details! 


 After


Black has the ability to dress any piece up, but what I love about this particular one is it still has a rustic feel after the distressing.  


 All the original hardware had been removed at some point.  We decided on keeping the pulls for the bottom drawers because they were unique and then just filled holes in the smaller drawers and added new knobs. 


 I love a beautiful piece of wood, but I also love the pieces that carry scars.  These tops have so much character and keep the piece from feeling too stuffy.  Maple is a hardwood so it doesn't stain as darkly as a piece of mahogany or cherry would. 


 I used to hate cracks and dings because I felt like they marred the finish, but I'm embracing the imperfections more and more.  This baby has lived a long life and is still kicking so I will celebrated her cracked facade and salute her many years of service to come (and looking awesome while doing it)!


 It was raining buckets while I was taking these pics, but I had a little sunshine in the garage with me. :)