Showing posts with label white. Show all posts

Thursday, October 29, 2015

Antique Chest of Drawers

The woman I bought this dresser from said it was her grandmother's and that she, herself, had used it as a little girl.  There was a spot of nail polish on the top and she remembered how it got there. I love stories like that. 

My client actually emailed me saying she had been following me for a while (love that, too) and wondered if I had any 3 drawer dressers for sale.  I just happened to have this pretty thing waiting in the wings and it was a perfect fit.

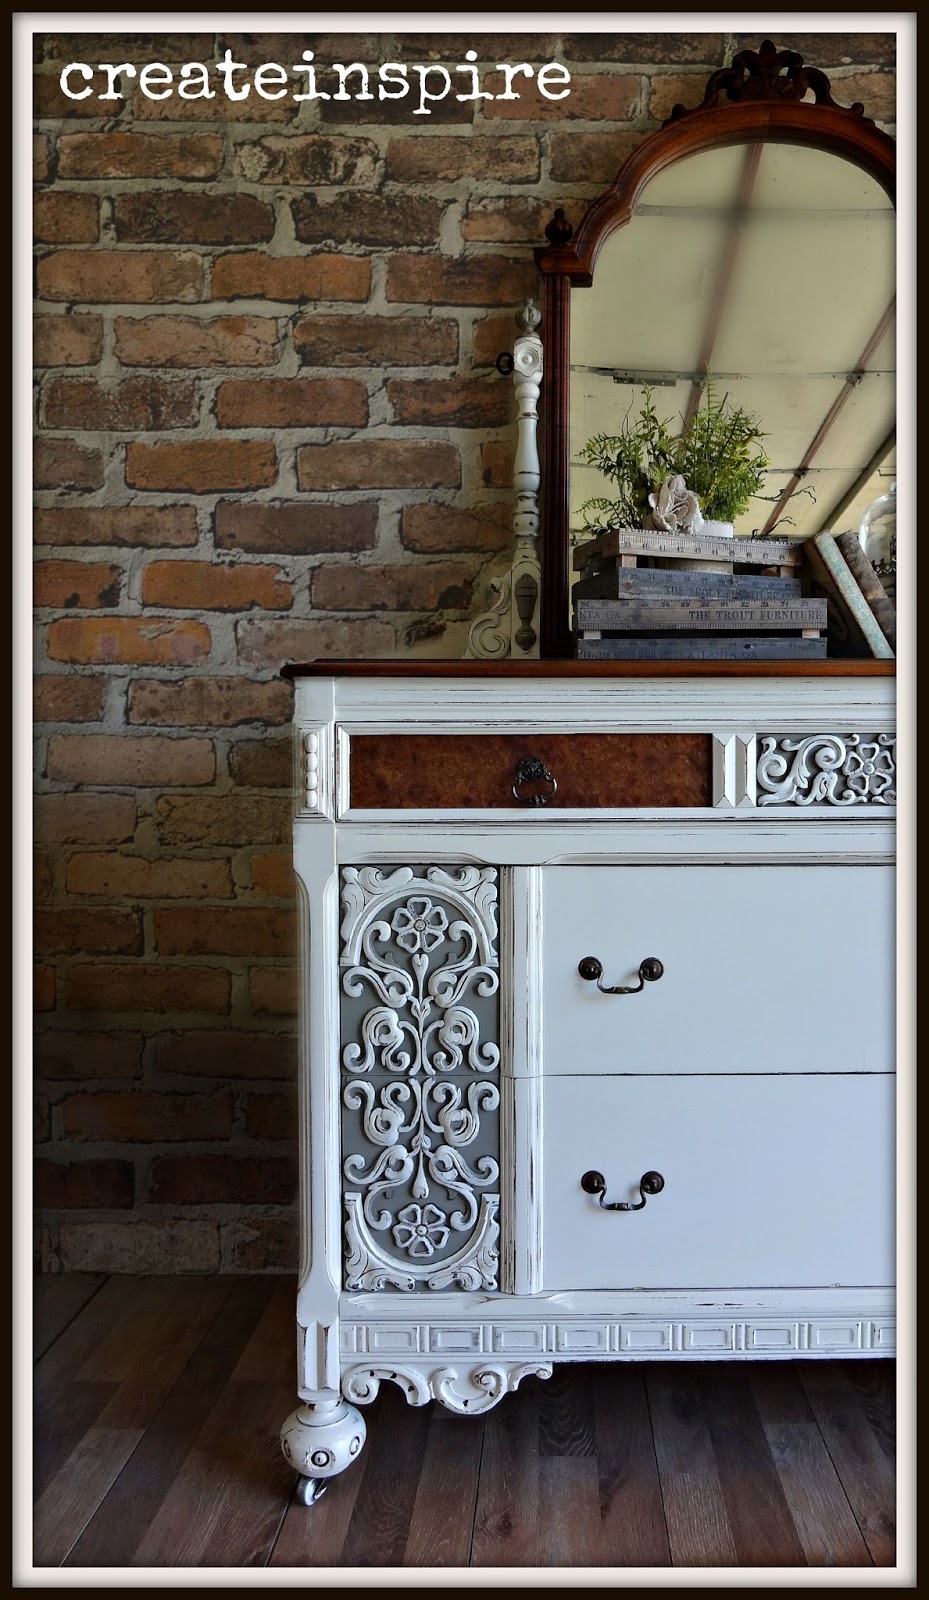
She sent me pictures of her room and said she liked when I kept some of the drawer fronts wood.  Well, I got to looking at this baby and realized, because of the detail, refinishing the drawer fronts instead of painting them would be a big ol pain in the rear.  So, I put my thinking cap on and came up with a way to make both of us happy. :)

I actually hand sanded the middle sections of the bottom two drawers.  My son had a friend over while I was doing it and he said, "Wouldn't that be easier with an electric sander?"  Why, yes, yes, it would, but I didn't want to take the chance of sanding through the veneer or accidentally popping the appliques off by hitting them with the sander (yes, I have done that before). I then stained the drawer fronts with Antique Walnut from General Finishes to match the top (Java would have been a little too formal looking for the room it was going in, IMO) and painstakingly taped off the middle section so I would have a nice crisp line when I painted.  It was a lot more work but the result was worth it. 

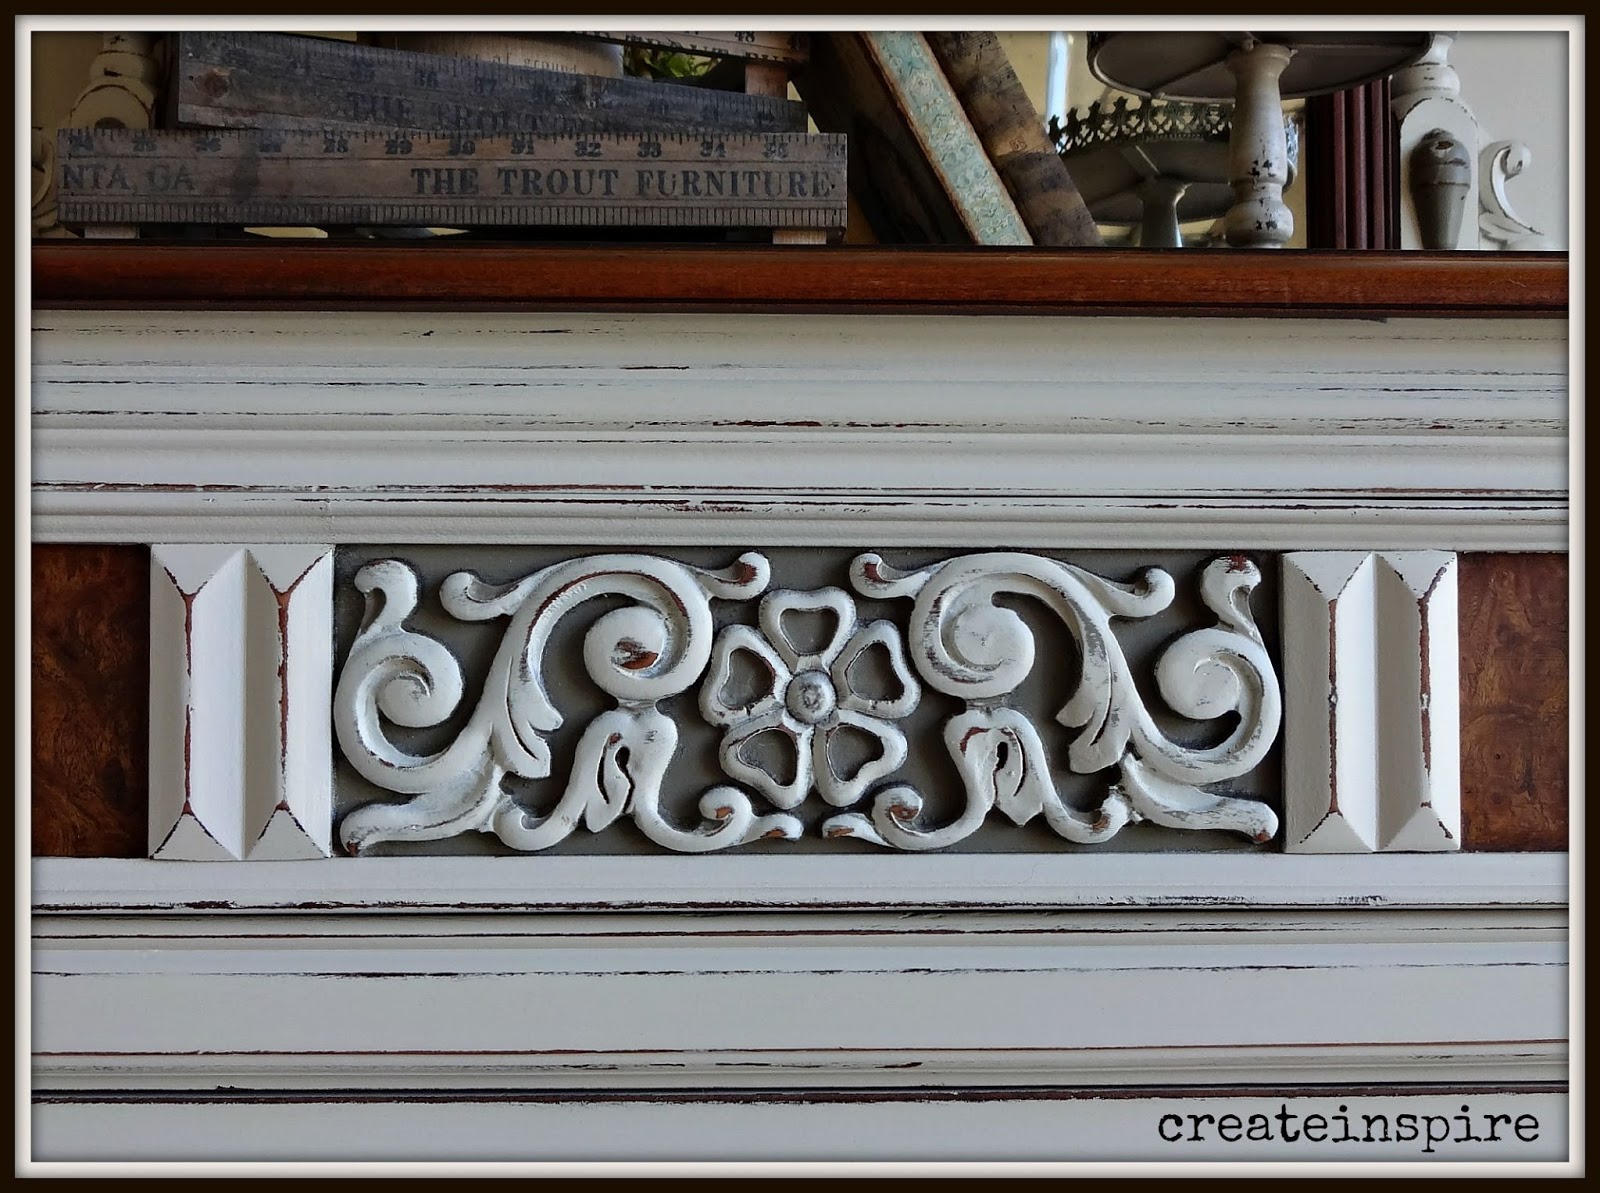
The first time I painted it I did all the detail a different color than the body and it was just too much.  I didn't like it and ended up painting over it (sometimes the reality of a vision just doesn't work out).  Then. I was afraid it was too simple, but I love how the simplicity lets the design of the drawer fronts stand out. 


 BEFORE


 AFTER

The top drawer was actually oak while the rest of the dresser is mahogany, maple, and cherry.  I didn't like how it looked especially with the designs in the middle of the drawers being black.  I like it much more all white. 


I love the finish and the light distressing. 


Her room is pretty neutral with pops of turquoise so I love how these knobs are understated yet have just enough color to give them some interest.  The antique brass edge also ties in with the original pulls which I had to leave because they had made such deep grooves in the drawers that I couldn't sand them out and it looked funny with different hardware. 


I lightly glazed the details.  See the curly cues in the wood?  I'm still on the fence about painting them white, cuz once I do it's done, there's no going back!  Hmmm....


The top was pretty rough looking before and now it's just lovely. 


I really like the warmth of the wood with this soft white. 

Wednesday, September 30, 2015

Antique Dresser

I was fortunate enough to buy this dresser along with the vanity I posted yesterday.  You can imagine how giddy I was to bring them home.  

When I listed the vanity yesterday I had a client say that she loved it and only wished it was a dresser.  I said, "Oh?  I happen to have the dresser, too!"  She said she wanted it refinished the same as the vanity and I was very happy about that.  They are truly stunning together. 

The vanity is still available and if it doesn't sell by the end of the week I think I am going to keep it! 


BEFORE


 AFTER


I just have to stop and stare. lol


I had to sand the top of this one down as there were deep scratches in it.  Instead of staining it and sealing it with poly (my normal routine) I stained it and finished it with Minwax Antiquing Oil.  I love the soft luster it gives.  Poly has the tendency to look "cold" and oil brings out the warmth in the wood.  I think it might be my new go-to.


The detail is so striking.  I love this deep neutral behind all that creamy white. 


There isn't any part of this dresser that isn't amazing. 


The burled maple was lighter on this piece than it was on the vanity and I didn't like it with the white, so I sanded it down and then gave it two coats of Danish Oil in Dark Walnut. 


I sanded the bejeebers out of the drawers so the finish is like silk.  


Monday, September 28, 2015

Antique Vanity

I almost don't want to say anything about this vanity.  It really is one of those pieces that you only get your hands on once in a lifetime (although I pray that's not the case!).  It's a beautiful piece and it was in very good condition (just some minor veneer issues on the inside panel). 

I was so excited to get to work on it that I forgot to take a before!  I can't believe I did that! 

The wood was beautiful.  It's made of mahogany, walnut, and maple.  I wanted to keep as much of it as possible, but still help all that detail stand out. 

I had a very hard time deciding what to do with it, so chose to keep it neutral.


 AFTER


The top was in such beautiful condition that I chose not to refinish it.  I used Minwax Antique Oil to revive and protect it. 


Same with these burled maple drawer fronts.  Just a little bit of oil and they looked amazing. I also chose to keep the original hardware.  I couldn't picture anything that would look more appropriate. 


 I also chose to keep the mirror frame natural and to contrast it by painting the spindles. 


 I painted the drawer fronts Hardware from Sherwin Williams and then painted the body and all the detail in my custom off white. 


 The feet are incredible and I glazed them to help the details pop. 


She is so beautiful.  Nuff said. 

Friday, August 14, 2015

Antique Vanity in my white


This piece was another mercy buy.  I picked it up from an elderly lady who said she'd had it for 40 years.  It was left in her home when she bought it, so it didn't have sentimental value to her, but she liked the piece and wanted to do something with it one day.  Well, that day never came.  When I went to pick it up it was in very rough shape.  So much so that I wanted to leave it there.  BUT, I had driven an hour and she looked so hopeful that I just couldn't say no! Yes, big big big problem of mine!

Last week a man asked me how I could charge $250 for a dresser.  Well, I knew he didn't know furniture, but I also couldn't let the opportunity to rid the world of one more ignorant person pass, so I simply told him exactly what cost went into a restoring a piece of furniture.  What I did not tell him was the WORK that goes into restoring a piece of furniture!

I also gave him a little cost comparison between refinished antique furniture and Pottery Barn.  We all know most furniture (yes, even the "nice" stuff) is MDF compared to all wood furniture from the past.  But, I would sound like a broken record if I went into all that again.  Suffice it to say, he did not have anything to say when I was done. ;)  (What?  I was nice!)


This pic is an in-progress pic of the veneer coming off the top.  It was lifted (the sub layer, too, which had to come off as well) and cracked all over (no way to fix it).  I was sad to have to remove all that mahogany veneer but it had been sitting in a damp garage and there was no salvaging it.  I was lucky there was some good wood underneath all of it. 

I used an iron and a damp rag to loosen the glue and a chisel to remove it. 


Same process for the drawers.  Yep, it's a mess and it sucks!  The drawers were worse than the top.  Most of it was barely hanging on. 


 I glued the sublayer back on and clamped it.  And, the beading came off when I was peeling the veneer.  I loved it so much I couldn't see it go in the trash, so I painstakingly glued it back on. Yep, it sucked, too, but it was worth it. 


 The top part of the mirror was completely missing so I had hubby  make me a new piece.  It wasn't curvy like the old piece but it's a lot sturdier and got the job done! :)


The drawers were ink-stained and nasty, too.  I gave them 2 coats of shellac and then painted the.


 Here it is after I peeled all the veneer, patched the dings, and sanded it all down. 


AFTER

I loved how rustic this vanity looked and I wanted the final look to be in keeping with it's age and condition.  It is a beautifully solid piece (thank you  master craftsmen), but she's got history!  I used a custom white and a custom turquoise to keep it soft and then heavily distressed her. 


I found these knobs on Antique Farmhouse and just had to have them.  Then when I saw this vanity I knew they just belonged together.  So beautiful.  And, look at all that texture from the old medium that was on the details. Makes my heart go pitter patter!! :)


Ok, I seriously just want to touch it right now.  I'll be right back....


Yep, love it. 


This is my favorite part.  I was sad all the veneer had to come off the top, but was happy to see there was solid wood underneath.  Now, it wasn't perfect, but neither is the rest of the vanity.  I love a dark top, especially with white, but I just felt like it would be too formal for this piece.  I opted to sand the existing wood down and stain it gray.  Yep, it was a first for me.   Minwax has a new color and this was the perfect piece and the perfect wood for it.  I don't think it would do anything to a dark piece like mahogany or cherry, but think it looks great on lighter woods like oak and maple.  Now there were gouges in this wood (after all it was just the sub layer) and the gray stain settled nicely into them and just darkened the rest of the wood a little.  A perfect weathered look! I sealed with 3 coats of poly. 


My hubby said, "What about the cracks?"  I said, "What about them?"  He said, "Don't you want me to fix them?"  I said, "Nope, I love them just the way they are.  They're perfect."  I then got "the look".  Oh, you know the one I'm talking about! 


Cute little legs. 


Drawers are so much nicer when they're clean. ;)  I promise your buyer will thank you for it.  I wax the outside and top edges, as well, so they slide easier. Works like a charm.


I adore everything about it! 


Friday, June 19, 2015

Antique Wash Stand


Funny story.  I saw this cute antique wash stand listed on my local FB classifieds page.  I didn't see it in time and a few others had already said they would take it.  A friend of mine is the one who ended up with it and I was just a teensy bit jealous. ;)  I love these sweet little pieces.  

It was gone, but I knew it was in a good home (I was still sad I didn't get to get my grubby little paws on it though!).  Fast forward a couple of months...she messages me and asks me if I would like to do a desk and hutch for her daughter...

AND...

the cute little wash stand!  Yay! :)

She wanted to keep it neutral and I knew it would be perfect in a soft white.


BEFORE

It had been refinished once before.  The hardware that's on there isn't the original.  I found previously filled holes and the back plates were to cover them up.  Whoever refinished it also used a really light wood filler that didn't take the stain, so anywhere they had filled holes you could see it, 


 AFTER

I mixed this white a few weeks ago from some left overs and it's my new favorite.  No pink, gray, or yellow undertones.  It's soft and a little warm and I have to touch it every time I use it. 


This baby is definitely old and I love how the paint picks up all the great imperfections in the wood.  So cute!


 The top was in good condition so I sanded it down, gave it one coat of Java Gel, and a few coats of High Performance Top Coat (from General Finishes) in flat.  I never, never, never get tired of white paint with a dark top!


 Am I crazy that I love all those little holes in the top edge of the top?  


 I thought the knobs needed to contrast a little more than the white ceramic ones that were on there.  I love these antique brass ones.


Look at the cute sides!  I told her if she doesn't want to keep it I will take it back! :)