Wednesday, October 10, 2012

Long Dresser Redo

This is going to be a short post....gotta run again!  This dresser is part of the set that goes with this highboy.  

Sorry about the before picture.  The drawers were already out and I was too lazy to put them back in for the pic. :0


 Before


 After


Monday, October 8, 2012

Highboy Makeover

The same client who had me do this chair is giving her bedroom a makeover.  She brought me her bedroom set and asked me if I could update it a little.  She decided on a creamy white to pop against the dark gray she's doing on the walls.  Can't wait to see it when it's done!

This set is actually mostly particle board, but it still gets the same treatment as the real stuff.  I just make sure I scuff it up really good (make sure all the gloss is off the finish) before I prime and then I don't distress much.  


 Before


 After

You can't really go wrong with a coat of white paint.  Love how fresh it looks!


I also love how just changing out the hardware can make such a big difference.


Sunday, October 7, 2012

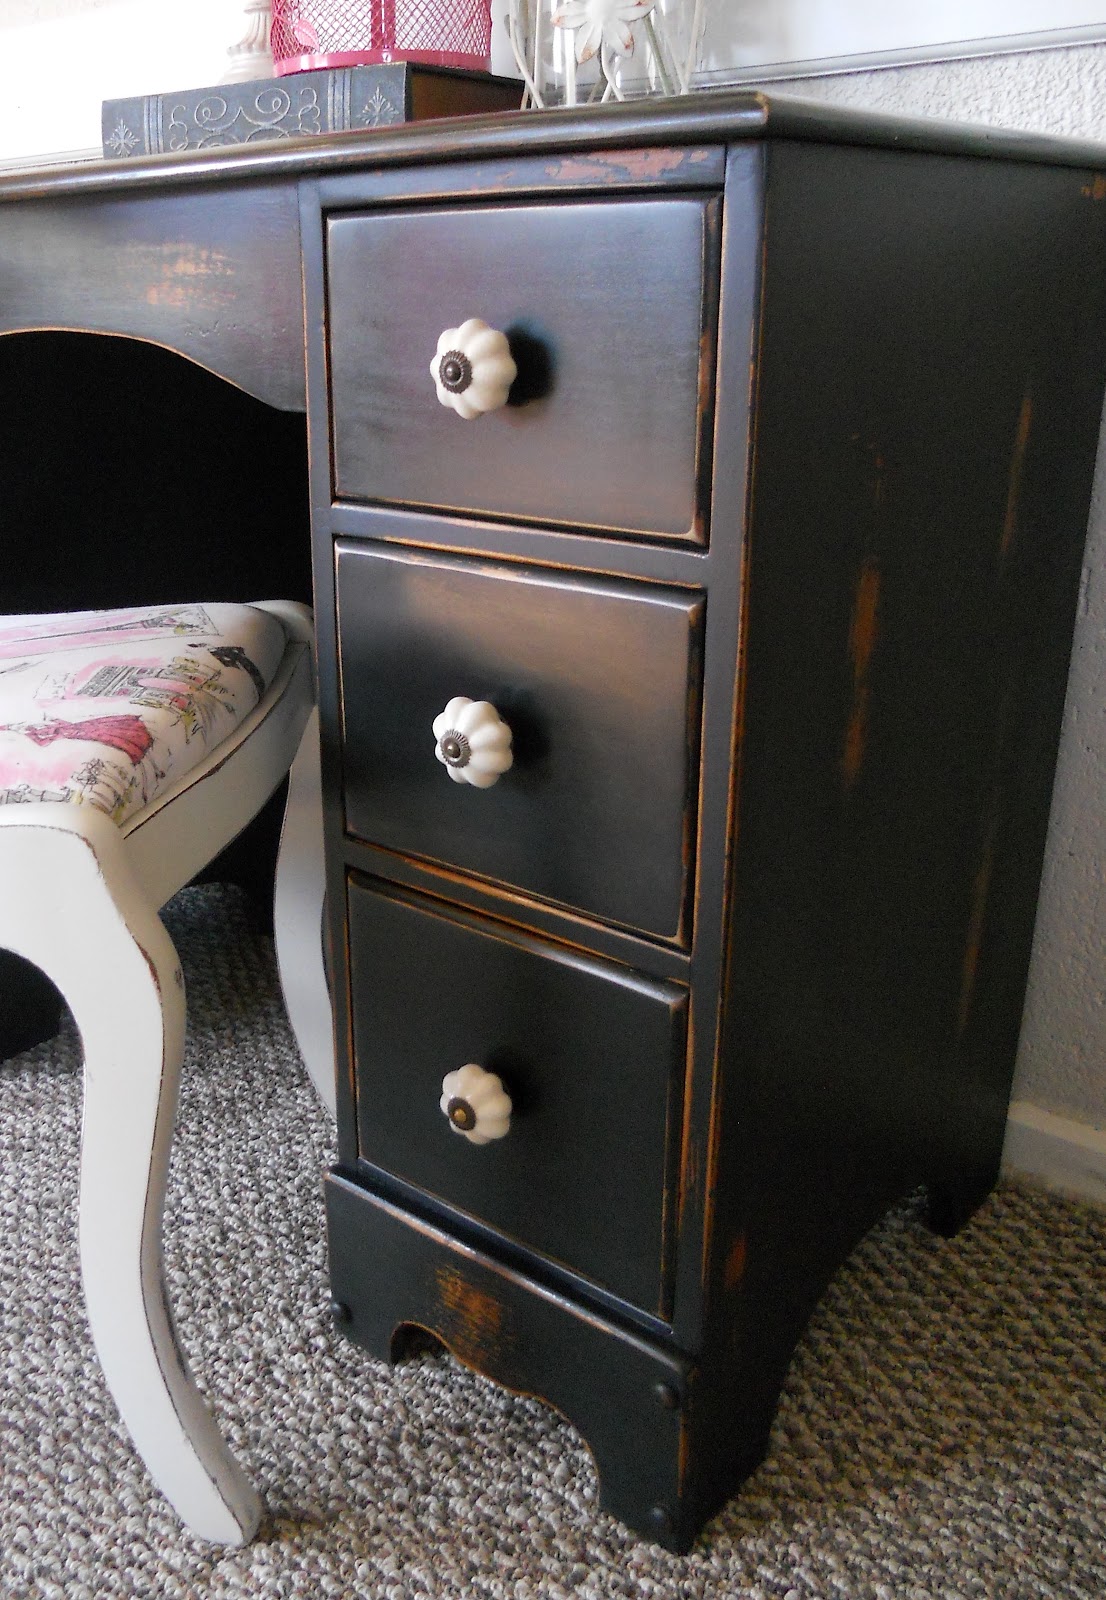
Girl's Desk in Black

I happened to be out of town and had a few minutes to kill a few weeks ago while waiting for a friend. I told myself I would go into Goodwill and "just look"--well 5 minutes later I was loading this desk into my husband's truck. It was meant to be!  :)  I had driven my car and was going to walk out without it because it obviously wouldn't fit when DH (who drives our truck) just happened to call. I said, "Where are you?"  He said, "In Green Bay." (He travels a lot for his business.)  I said, "How far are you from Goodwill?"  He said, "I'm just going by."  You can't tell me that's not fate!!   :)

 I loved the simplicity of the columns and the curve of the front piece and it was in fairly good condition--nothing a little wood glue couldn't fix.  Too good to pass up. :)


 Before


After


 I hated the original pulls (sorry) and love how these knobs give it such a feminine feel without being over-the-top girly.  


 I wanted this desk to have a softer look and feel, so I ended up waxing it instead of using poly.  I love the look it has (and it feels like butter), but I will NEVER wax over black again!  I try not to cry doing this job (it's just furniture, right?), but I was pretty close on this one ( I had to sand the top and the drawers off and pretty  much start over at one point).


 I absolutely love the contrast of the white chair and knobs with the black.  I also love how it just has a worn well-loved feel.  


 Still think this chair is so sweet.  Ania (my daughter, who is 7) asked me if she could buy it from me! lol!


These drawers were a mess.  I think someone spilled ink in them. I painted them (with 4 coats!) and lined them with the same fabric as the seat.


Cassie, over at 
Primitive and Proper
featured this cute little desk.  Thanks Cassie! 


Linked up here:

 
Primitive and Proper


{Primp}Furniture Feature Fridays


The Shabby Nest


Saturday, October 6, 2012

Lamp Shade Update

I bought a new lamp for my shop to stage my pieces.  It came with a cute little red shade, but I wanted it to be a little more versatile.  I bought another cheap shade at Walmart and gave it a little update. 

Sorry if the pics are a little hard to see.  The lighting in the kitchen isn't so great right now because half the bulbs are burned out and, of course, I'm waiting for someone else to notice and change them.  Ha!  ;)

 Before
Basic shade.  Think it was a little under $5


 I laid out my fabric and, starting close to the edge, rolled the shade around while tracing an inch from the top and bottom.  If there is a pattern on your fabric that has to face a certain way make sure you pay attention to that when you are placing the shade.   Your pattern should look something like this.  


 Then I used seam tape (the kind you use with your iron--no sewing here folks!) to finish off the edge that would be showing.


 Can I just say that I love this stuff!  I use it for everything!  I lightly sprayed the fabric (it gets sticky EVERYWHERE, so make sure you cover your space with paper), and then rolled the lamp shade along the fabric and smoothed out any wrinkles.  


 This is what it will look like with the unfinished edges.  I used my hot glue gun to run a bead of glue around the inside edge and then tucked the fabric under the rim of the shade.  I trimmed the fabric fairly close to the edge so there wasn't a lot of extra fabric on the inside of the shade. 


 Then I added my embellishments.  You could use so many cute things!  Loved these flowers--I found them in the scrapbooking section at Hobby Lobby.  


I love it's new look!  There are so many possibilities and just for a few bucks! :)


Friday, October 5, 2012

FP Dresser--part III

Either I am totally losing my mind or someone is sneaking into my house, pilfering through my purse, and deleting pictures from my camera in the middle of the night. The second choice is totally plausible!! Well, I could have sworn I took a before pic of this dresser, but it's nowhere to be found. :( But, the good news is it looked just like the other pieces I did last week. :) Love the dresser ALMOST as much as the hutch  (ok, not true, the hutch wins, hands down), but it is a great looking piece of furniture! :)


All 6 of these pieces are sitting in my shop and they look sharp together! 

Can't wait to post what I did yesterday and today (I hate waiting for things to dry!!)


Radio Cabinet Featured!

Good Morning!  I just wanted to tell Karen over at


Melissa @
Furniture Paint and DIY fun

and Lauren over at


 thank you for featuring this cute little radio cabinet.  You should head on over and check their blogs out!


What a great way to start my weekend!  :)